👉 Let’s stay connected on social media!
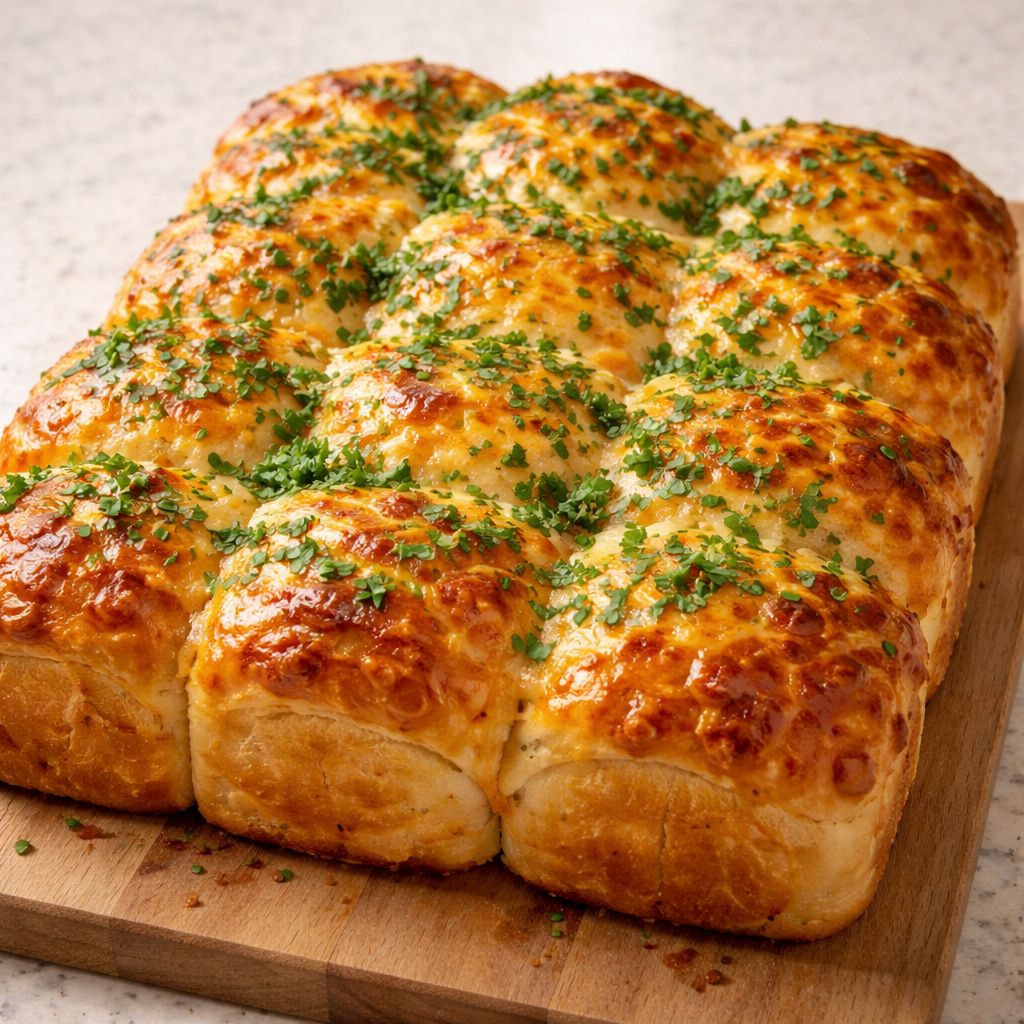
How to Make Easy Cheesy Garlic Bread with Soft Hawaiian Rolls
QUICK REMINDER:
There’s a “jump to recipe” button for convenience, but if you head straight to the recipe card, you might miss useful ingredient notes, step-by-step tips, FAQs, and other helpful details that can make your dish turn out even better.
There are nights when the whole day feels slightly off, when dinner is more about patching everyone back together than impressing anyone. On those nights, I find that what people really want at the table is something buttery, familiar, and easy to pull apart with their hands. Something that smells like comfort before it even hits the plate.
That is where this easy cheesy garlic bread lives. Not the crispy baguette that shatters everywhere, not the fussy loaf that needs three kinds of cheese, just soft, toasty, pull apart rolls that you can slide into the oven while the rest of dinner finishes. If you have 10 quiet minutes, a small bowl, and a pan, you have this recipe.
Why This Cheesy Garlic Bread Works for Busy Nights
If you have ever over planned dinner, this will feel like a relief.
There are recipes that ask for your full attention, and there are recipes that gently fit around your life. This falls in the second camp. You can assemble it while pasta water comes to a boil, while soup simmers, while a kid tells you about their day and you are only half listening but fully there in the kitchen.
It is built on soft Hawaiian rolls, which already taste slightly sweet and tender, so you end up with that wonderful contrast of buttery garlic, stretchy melted cheese, and a lightly crisp edge on top. No wrestling with a hard loaf, no cloud of crumbs on the cutting board.
I like to think of this as the garlic bread version of my easy comfort bakes, the way cinnamon roll banana bread is to dessert. Same spirit, same yes, this will work feeling.
You do not need to pre toast, pre roast, or pre anything. Softened butter, minced garlic, a little fresh parsley, and cheese, that is it. The oven handles the rest.
The Short, Honest Ingredient List
Here is what you really need, and nothing you do not. If it helps, you can put everything out on the counter before you start, it makes the whole thing feel quicker:
- 8 soft Hawaiian rolls
- 1 cup shredded cheese (Cheddar or Mozzarella)
- 4 tablespoons butter
- 4 cloves garlic, minced
- 1 tablespoon fresh parsley, chopped
- Salt to taste
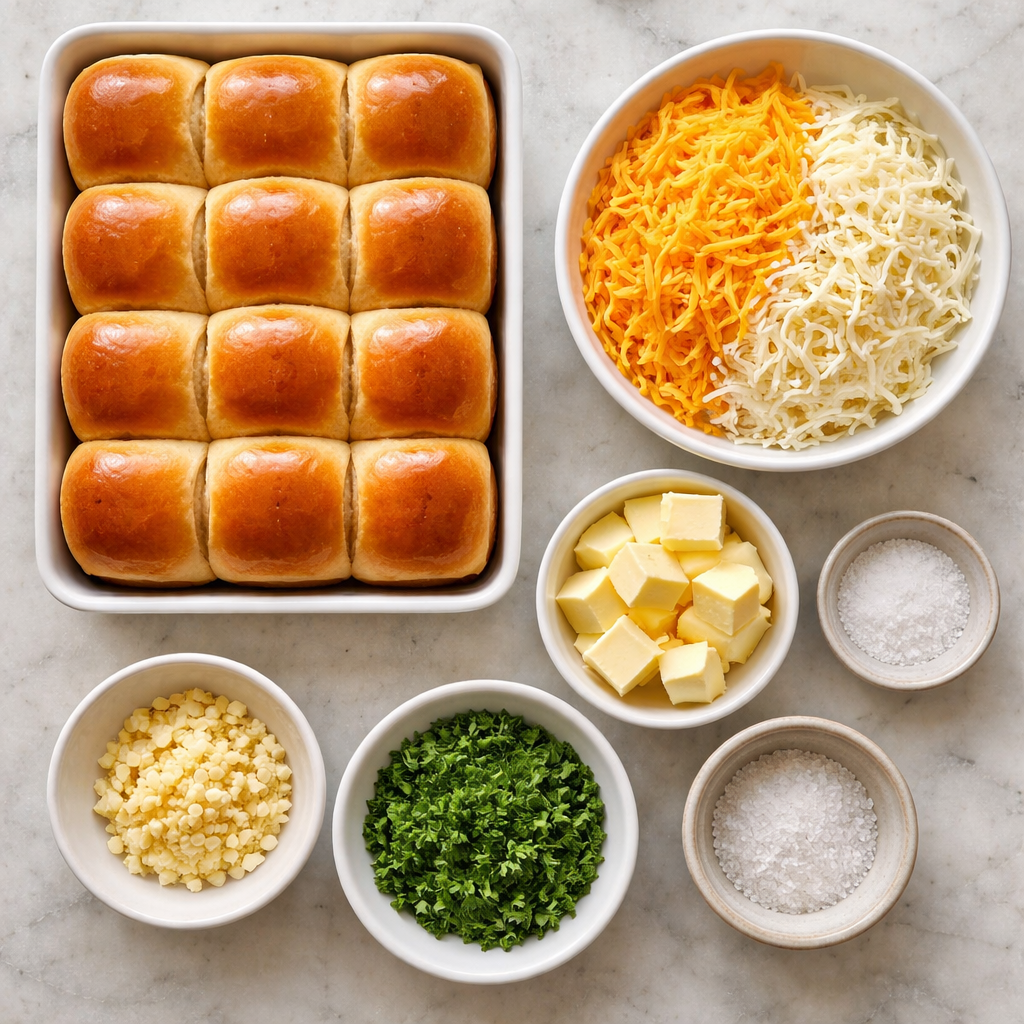
A couple of small notes, because these details matter in home kitchens:
If you can, use real butter, not margarine, the flavor wraps around the garlic in a way that feels fuller. Cheddar will give you a slightly sharper, more savory edge, while mozzarella melts into that familiar stretchy, pizzeria style pull. Both are good, sometimes I quietly use a mix of the two.
Fresh parsley adds color so the rolls look like you did more work than you did. If you only have dried, you can still make this, use a smaller pinch and rub it between your fingers to wake it up.
How To Bring It Together (Directions)
You can follow this almost on autopilot, which is part of its charm.
- Preheat the oven to 350°F (175°C).
- In a small bowl, mix the softened butter, minced garlic, salt, and chopped parsley.
- Slice the Hawaiian rolls in half and spread the garlic butter mixture evenly on each half.
- Top each half with a generous amount of shredded cheese.
- Place the rolls on a baking sheet and bake for 10-15 minutes, or until the cheese is melted and bubbly.
- Serve warm as a side dish or appetizer.

The only real thing to watch is the last few minutes in the oven. You want the cheese melted and starting to bubble at the edges, and the tops just turning golden. If you forget them for a couple of extra minutes, they will probably be fine, the sweetness of the rolls forgives a lot.
Little Cooks, Big Help
This is one of those recipes that kids or nervous cooks can actually own. There is no stove top splatter, no hot oil, just a gentle oven and a baking sheet. If you have small hands in the kitchen, they can help with:
- Laying out the roll halves on the pan
- Stirring the butter, garlic, salt, and parsley together
- Sprinkling the cheese (which usually ends up generous, not a problem here)
If you are cooking alone, this is the step in your evening where you can slow down a little. You spread, you sprinkle, you line things up. It feels small but satisfying, like making a bed with fresh sheets.
Sometimes I will put the prepared pan in the fridge if dinner is still a while away, then slide it into the oven during the last stretch of cooking something else, like a pan of garlic parmesan potatoes. Everything comes to the table hot, and it looks as if you planned it all along.
Tiny Tweaks That Make It Yours
Once you have made this version once or twice, it becomes a template.
You can tuck a very thin slice of tomato under the cheese for a softer, almost pizza like bite. Add a small pinch of red pepper flakes to the butter mixture if your table likes a little heat. A dusting of grated Parmesan over the top right before baking gives you extra golden, salty spots.
If you are cooking for someone who does not love strong garlic, you can cut the garlic back to 2 or 3 cloves, or very gently sauté the minced garlic in a teaspoon of butter just until fragrant before stirring it into the rest of the softened butter. It rounds out the flavor, takes away that sharp edge.
And if you have a mix of eaters, you can always leave a couple of the rolls without cheese, just garlic butter. They will still be devoured.
Serving Moments: Not Just A Side
Most of the time, this cheesy garlic bread lands on the table beside a pot of soup or a pan of baked chicken and salad. It does its job quietly, disappearing one roll at a time.
But it also works on its own in that in between space, when dinner is running late and everyone needs something now. I have set out a plate of these and a bowl of marinara sauce and called it a snack dinner more than once. No one complained.
You can also slice the rolls smaller after baking and serve them as an appetizer when you have people over. Warm, handheld, no knife required, you can stand around the kitchen island and eat them while something like garlic parmesan shrimp finishes in the air fryer. It turns waiting into part of the meal.
If you happen to have leftovers, they reheat well wrapped in foil at 325°F until warmed through. The cheese softens again, the rolls get cozy, it is not their first moment out of the oven, but it is still very good.
When Something Feels “Off”: Troubleshooting In Real Time
Most garlic bread mishaps fall into a few familiar categories: too soggy, too dry, too bland, or too dark around the edges. The nice thing about starting with soft rolls is that you avoid a lot of that.
If the tops are browning before the cheese is fully melted, tent a piece of foil loosely over the pan for the last few minutes. If the bottoms feel a little too soft, move the pan to a lower rack next time so the heat hits from underneath more directly.
If you taste the first batch and wish for more garlic, it is perfectly fine to smear a tiny bit of raw garlic butter on a hot roll right out of the oven. The residual heat tames it just enough. And if you oversalted the butter mixture, you can balance it by adding a tiny bit more unsalted butter and another pinch of parsley, then using a lighter hand as you spread.
The goal is not perfect garlic bread, it is bread that tastes good enough that people reach for a second piece without thinking.
Questions You Might Be Asking
Yes. You can assemble the rolls up to a few hours ahead, cover the tray, and keep it in the fridge. When you are ready, bake straight from the fridge, adding a couple of extra minutes if needed until the cheese is melted and the edges are golden. The only thing I would not do too far in advance is chop the fresh parsley, it stays brighter when done closer to baking.
Use them. The flavor will be a little less sweet and the texture a bit less squishy soft, but they will still turn into very good cheesy garlic bread. If the rolls are large, you might want to cut them into smaller pieces after baking for easier sharing.
You can. Fresh garlic gives a brighter, more pronounced flavor, but if all you have is garlic powder, start with about 1/2 teaspoon mixed into the butter, taste, and add a little more if you like. Powder can go from mild to overwhelming quickly, so it is better to build up slowly.
Bake on the middle rack, not the very bottom, and use a light colored baking sheet if you have one. Dark pans brown faster. Also, avoid over baking, once the cheese is melted and bubbling and the tops are lightly golden, you are done, even if the timer says you could go longer.
You can, though the texture softens a bit. Cool the rolls completely, wrap tightly, and freeze. Reheat from frozen wrapped in foil at 325°F until hot in the center. For me, this is more of a bonus option than a plan, since they rarely last long enough to freeze.
A Quiet Little Win On The Table
There is something steadying about recipes like this, the kind you can almost make on muscle memory after a while. You remember to soften the butter, you mince the garlic without thinking too hard about it, you taste the salt, you scatter the cheese. The kitchen smells warm and familiar, and suddenly dinner feels less like a hurdle and more like a small, manageable thing.
This cheesy garlic bread will probably never be the star of a holiday spread, and that is part of its charm. It is the dependable side that shows up on a Tuesday night, the thing you slide into the oven when everyone is tired and you just want to feed them something that tastes like care.
Print
Easy Cheesy Garlic Bread
- Total Time: 25 minutes
- Yield: 8 servings 1x
- Diet: Vegetarian
Description
Soft Hawaiian rolls topped with buttery garlic and melted cheese, perfect for busy nights.
Ingredients
Scale
- 8 soft Hawaiian rolls
- 1 cup shredded cheese (Cheddar or Mozzarella)
- 4 tablespoons butter, softened
- 4 cloves garlic, minced
- 1 tablespoon fresh parsley, chopped
- Salt to taste
Instructions
- Preheat the oven to 350°F (175°C).
- Mix the softened butter, minced garlic, salt, and chopped parsley in a small bowl.
- Slice the Hawaiian rolls in half and spread the garlic butter mixture evenly on each half.
- Top each half with a generous amount of shredded cheese.
- Place the rolls on a baking sheet and bake for 10-15 minutes, or until the cheese is melted and bubbly.
- Serve warm as a side dish or appetizer.
Notes
For a different flavor, try using a mix of cheese or add a pinch of red pepper flakes.
- Prep Time: 10 minutes
- Cook Time: 15 minutes
- Category: Side Dish
- Method: Baking
- Cuisine: American
Nutrition
- Serving Size: 1 roll
- Calories: 250
- Sugar: 2g
- Sodium: 350mg
- Fat: 14g
- Saturated Fat: 8g
- Unsaturated Fat: 5g
- Trans Fat: 0g
- Carbohydrates: 30g
- Fiber: 1g
- Protein: 6g
- Cholesterol: 30mg