👉 Let’s stay connected on social media!
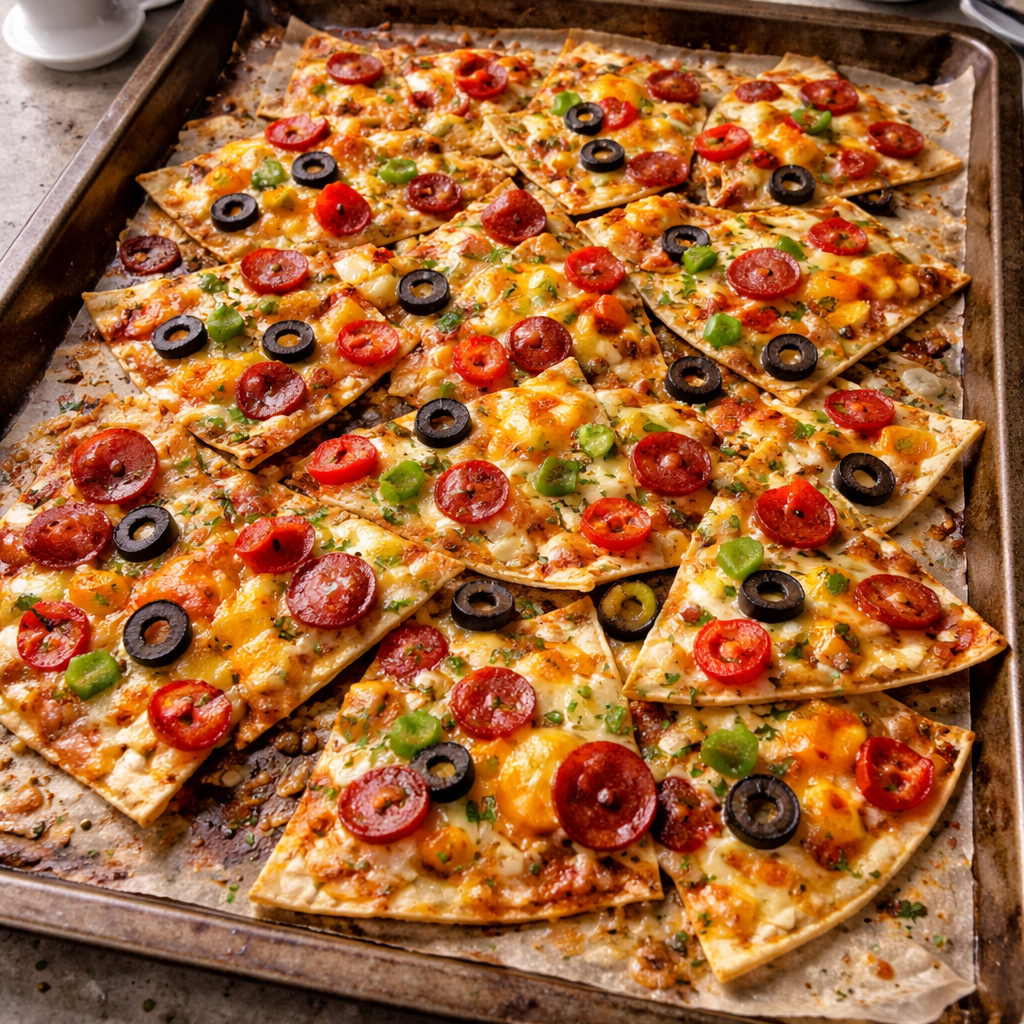
How to Make Crispy Pizza Chips for a Perfect Snack Anytime
QUICK REMINDER:
There’s a “jump to recipe” button for convenience, but if you head straight to the recipe card, you might miss useful ingredient notes, step-by-step tips, FAQs, and other helpful details that can make your dish turn out even better.
There is a particular kind of hunger that shows up between meals, the one that has you standing in front of the pantry thinking, “I want something crunchy, but not plain chips again.” It is the same feeling that makes you scroll through ideas and then give up because everything looks fussy or like it will dirty every pan you own.
These crispy pizza chips are for that exact moment. They use things you probably already have, they cook quickly, and they land in that happy space between snack and mini meal. You get all the pizza flavors, the browned cheese, the toasty edges, but in a tray of shatteringly crisp chips you can eat with your fingers. If you have ever loved pizza-ish freezer snacks on busy nights, this feels like their smarter, tidier cousin.
They are also oddly calming to assemble. There is a rhythm to brushing sauce, scattering cheese, tiny handfuls of toppings. You do it once and realize how easy it is to riff. Half the tray can be kid friendly, the other half more generous with the crushed red pepper. No one has to negotiate over slices. Everybody just reaches in.
The Snack Problem Pizza Chips Quietly Solve
There is a reason so many of us reach for chips when we are tired: they are fast, predictable, and you eat them straight from the bag. But then you finish and think, That was salty, but not actually satisfying.
Pizza chips solve the gap between “I need to munch on something now” and “I wish I had made real food.” They start with tortillas, not dough, so you are not waiting for anything to rise or rest. They bake up in about 10 minutes. You get enough fat and protein from cheese and toppings that it feels like food, not just a crunch habit.
They also make good use of the odds and ends that tend to linger in a fridge door or crisper drawer. Half a bell pepper, the last spoonful of olives, a little shredded chicken from last night’s dinner, they all find a home here.
And because you cut the tortillas first, everyone gets a lot of crisp edges. You know that outer ring of pizza where the cheese has frizzled right into the crust and you secretly wish there was more of that and less middle slice sagging under toppings. This is that feeling, in chip form.
Ingredients You Can Grab in One Trip to the Fridge
When a recipe leans this hard on a few ingredients, it helps to know what actually matters. The tortillas decide your crunch, the sauce decides whether things get soggy, and the cheese decides how everything holds together.
Here is what you will need laid out clearly, so you can scan your pantry and fridge without overthinking it:
- 4 tortillas Corn or Flour Tortillas (Choose corn for a traditional crunch or flour for a softer bite.)
- 1 cup Pizza Sauce or Marinara Sauce (Opt for thicker sauces to keep chips crispy.)
- 1 cup Shredded Mozzarella Cheese (Feel free to mix in cheddar, provolone, or Parmesan.)
- 1 cup Toppings (Customize with favorites like pepperoni, bell peppers, or olives.)
- 1 teaspoon Italian Herbs (Sprinkle on basil or oregano.)
- 1 teaspoon Garlic Powder (Adds a warm, aromatic layer.)
- 1/2 teaspoon Crushed Red Pepper Flakes (For a spicy kick.)
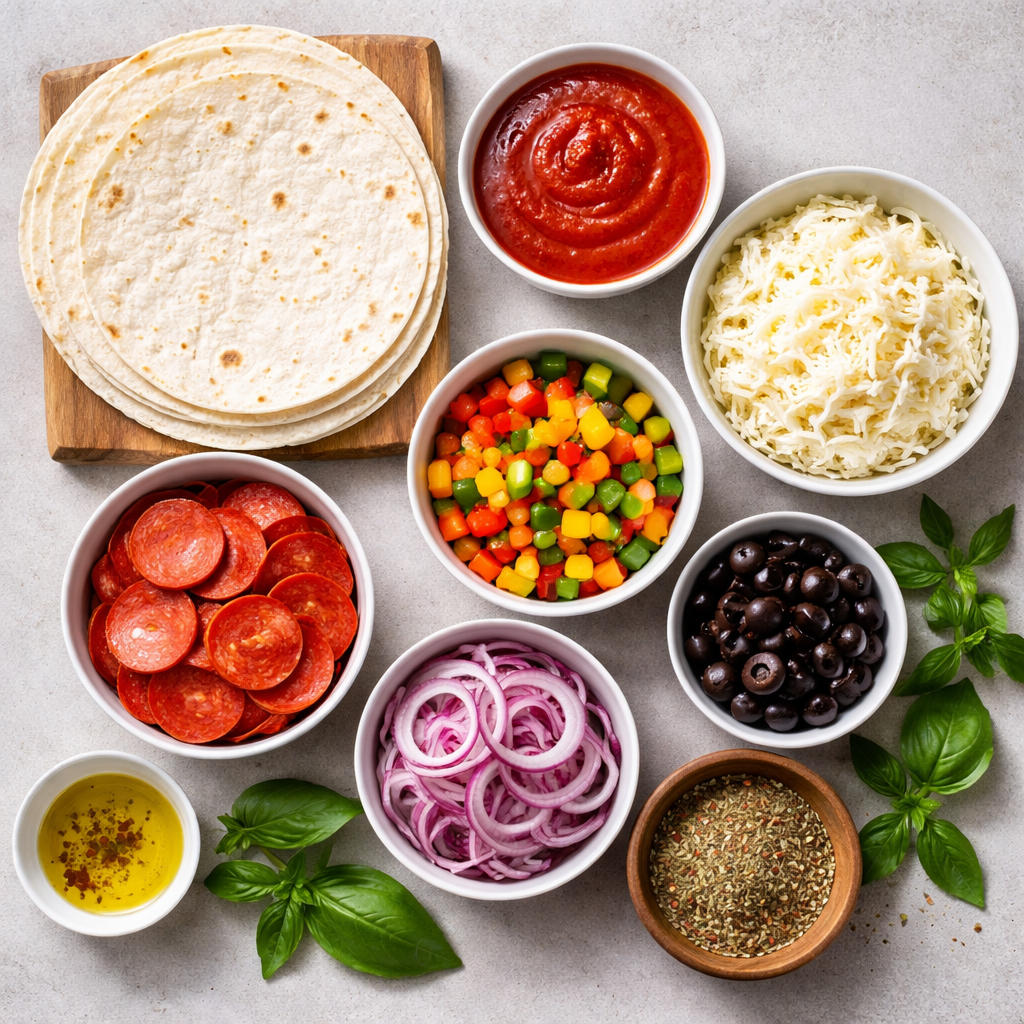
A few small choices make a difference. If your sauce is thin, let it simmer for a few minutes to reduce so it behaves more like a spread than a pour. If your cheese blend includes a sharper one, like Parmesan, you will get more golden, lacy edges. And toppings should be chopped small, think confetti, so they can dry out and crisp instead of steaming the chips underneath.
How to Make Crispy Pizza Chips
This is the kind of recipe you can start with the oven cold and still be eating in under half an hour. The only real job here is not to overload the tortillas, which is hard if you love toppings, but worth it for the crunch.
• Preheat your oven to 400°F (200°C) and line a large baking sheet with parchment paper for easy cleanup.
• Stack the 4 tortillas and cut them into wedges, like you would slice a pizza, usually 6 or 8 pieces per tortilla.
• Arrange the tortilla wedges in a single layer on the baking sheet, with a little space between them so air can move around.
• Lightly brush or spoon a thin layer of pizza or marinara sauce onto each wedge, stopping just short of the edges so it does not run underneath.
• Sprinkle shredded mozzarella evenly over the sauced chips, using a light hand so you can still see bits of tortilla peeking through.
• Scatter your chosen toppings over the cheese, keeping pieces small and not too piled so the chips stay crisp instead of soggy.
• Dust everything with Italian herbs, garlic powder, and, if you like heat, the crushed red pepper flakes.
• Bake for 8 to 12 minutes, watching closely near the end, until the cheese is bubbly, the edges of the tortillas are deeply golden, and a few spots look toasty.
• Let the pizza chips cool on the pan for 3 to 5 minutes so they firm up, then transfer to a plate or cooling rack and serve warm or at room temperature.
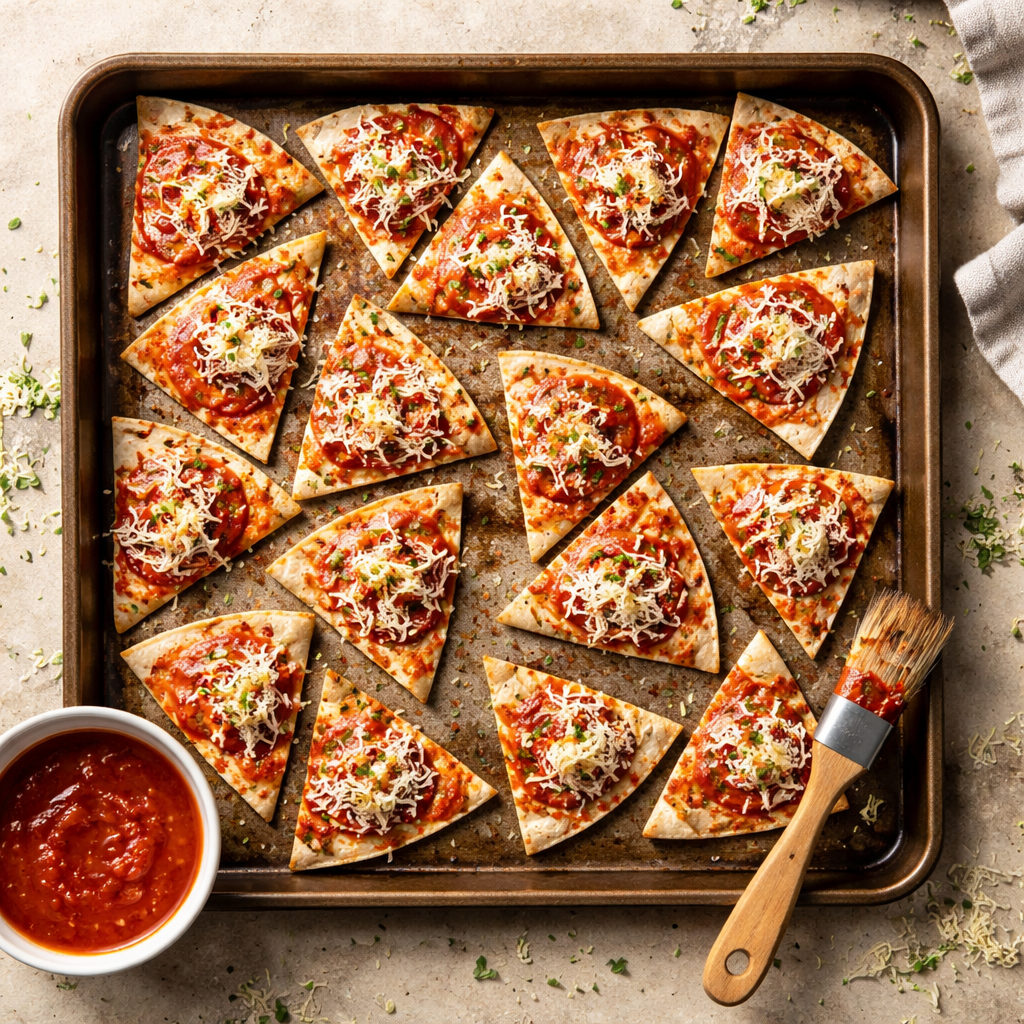
You will know you are in the right zone when you can lift a chip from the corner and it stays straight instead of folding. If your first batch comes out a little soft in the middle, put them back in for a couple more minutes, but check every 60 seconds so they do not tip from “perfectly crisp” to “a little too browned” while your back is turned.
Little Habits That Make Them Extra Crispy
Once you have made these once or twice, small habits settle in, the kind that quietly guarantee success even on autopilot nights.
Give the tortillas a moment of air. After you cut them into wedges, separate them into a loose pile on the counter while the oven heats. That tiny bit of drying time keeps them from steaming later.
Use a light hand with sauce. It can be tempting to treat these like mini pizzas, but too much sauce means sogginess. Aim for a thin swipe that just tints the tortilla red. You are seasoning the chip, not building a layer.
Grate your own cheese if you have the energy. Bagged shreds work, and you should absolutely use them if that is what you have, but fresh grated melts into more of that frico-like crispness around the edges.
Keep toppings dry and small. Pat olives dry, blot any cooked meat with a paper towel, and dice vegetables finely. If your bell peppers are cut in big squares, they will hold moisture and soften the chips underneath instead of letting them crisp.
And one more detail that makes a difference on busy evenings: bake the chips on the top rack. That extra bit of heat from above helps brown the cheese without needing a broiler, so you can tidy the kitchen or stir a pot of soup while they finish without hovering.
Ways to Serve Them So They Feel Like More Than a Snack
Pizza chips can absolutely be a stand alone snack, but with a few supporting pieces, they start to feel like a whole situation rather than a tray you accidentally ate by yourself.
Pair them with something fresh and cool. A simple bowl of crunchy romaine tossed with lemon, olive oil, and a pinch of salt takes about 3 minutes and balances all the salty, cheesy edges. You are basically making the salad you wish came tucked inside the box with your delivery pizza.
They also sit nicely next to a pot of soup. Tomato, vegetable, or a light chicken broth, anything that lets you dip a chip in without it collapsing completely. If you already love making big snacky bowls like savory Chex-style mixes for gatherings, these chips fit that same energy, just a little more dinner-adjacent.
For kids or picky eaters, keep toppings simple on one half of the pan, maybe just cheese and a mild vegetable, and go bolder on the other half. You end up with a built in variety pack without extra work.
Leftovers, if you have them, crisp back up on a baking sheet at 350°F for 4 to 6 minutes. They will not be quite as shatteringly crisp as the first round, but still miles better than a limp slice pulled from a box.
Questions That Come Up While the Oven Heats
Yes, you can, with a tiny adjustment in expectations. Whole wheat and many low carb tortillas tend to brown faster and can go from crisp to bitter if left too long. Start checking a couple minutes earlier than the recipe time, and pull a chip to taste. The texture will be a bit heartier, which some people actually prefer for snacking.
The three big helpers are: thicker sauce, lighter toppings, and space on the pan. If you can see tortilla around the toppings, you are in good shape. Make sure vegetables are chopped small and patted dry, and avoid piling ingredients. After baking, let the chips cool in a single layer so steam can escape instead of softening the bottoms.
No. Mozzarella melts beautifully, but a mix of cheeses is lovely. Try part mozzarella and part cheddar for extra flavor, or a sprinkle of Parmesan over the top for more golden, lacy edges. Just avoid very wet cheeses like fresh mozzarella slices, which can leak moisture and soften the chips.
You can, in small batches. Work in a single layer at around 375°F and start checking at 5 minutes since air fryers run hot. The chips brown quickly, so stay nearby. If you already use yours for things like pizza rolls, the timing will feel familiar.
They are, especially when you offer a couple variations on one big platter, like a veggie version, a spicy version, and a plain cheese batch. Just know that they are at their best within an hour of baking, so plan to bake close to when people arrive.
If You Want to Double This for a Crowd
Once people know these exist, they disappear quickly. Doubling the recipe is straightforward, but a few tricks keep the second pan from feeling like the “B team.”
Bake one sheet at a time if you can. Ovens promise even heat, but most home ovens run a little hotter at the top or back. Baking the pans separately keeps the browning more consistent. If they must go in together, swap their positions halfway through and rotate each pan front to back.
Keep the assembly line simple. Lay out cut tortillas, a bowl of sauce with a brush or spoon, a bowl of cheese, bowls of toppings. If anyone is wandering through the kitchen, hand them a job. This is the kind of snack that can occupy kids who like to help, especially if they are in charge of “their” section of toppings.
You can assemble the trays up to an hour in advance if you keep them uncovered in the fridge, just be sparing with the sauce so tortillas do not soak. Pop them in the oven right before you want to eat so you have that hot cheese, crisp edge moment that tells everyone to drift toward the kitchen.
A Small Comfort to Keep in Your Back Pocket
Some recipes live in a special mental drawer, the one you open on nights when you are too tired for real decisions but still want something that feels homemade. Crispy pizza chips tuck neatly into that space. They do not ask for much, a few tortillas, some cheese, a jar of sauce that is probably already open, and a handful of toppings.
What they give back is more than the sum of those parts, a pan that hits the table hot, smells like pizza night, and invites everyone to grab a piece and settle in. If you find yourself making them on the same evenings you are too worn out to tackle something bigger like full-on chicken Romano, that is exactly the point. Not every good thing has to be complicated. Sometimes it is just a quiet tray of crunchy, cheesy chips that buy you a little bit of breathing room between the day and everything that comes after.
Print
Crispy Pizza Chips
- Total Time: 22 minutes
- Yield: 4 servings 1x
- Diet: Vegetarian
Description
Quick and easy crispy pizza chips made with tortillas, pizza sauce, and your favorite toppings.
Ingredients
Scale
- 4 Corn or Flour Tortillas
- 1 cup Pizza Sauce or Marinara Sauce
- 1 cup Shredded Mozzarella Cheese
- 1 cup Toppings (e.g., pepperoni, bell peppers, olives)
- 1 teaspoon Italian Herbs
- 1 teaspoon Garlic Powder
- 1/2 teaspoon Crushed Red Pepper Flakes
Instructions
- Preheat your oven to 400°F (200°C) and line a baking sheet with parchment paper.
- Stack the tortillas and cut them into wedges.
- Arrange the wedges in a single layer on the baking sheet.
- Brush a thin layer of pizza sauce onto each wedge.
- Sprinkle shredded mozzarella over the chips.
- Scatter toppings over the cheese.
- Dust with Italian herbs, garlic powder, and crushed red pepper flakes.
- Bake for 8 to 12 minutes until cheese is bubbly and edges are golden.
- Let cool for 3 to 5 minutes before serving.
Notes
Use a light hand with sauce and let tortillas air dry for extra crispiness. Bake on the top rack for better browning.
- Prep Time: 10 minutes
- Cook Time: 12 minutes
- Category: Snack
- Method: Baking
- Cuisine: American
Nutrition
- Serving Size: 1 serving
- Calories: 250
- Sugar: 3g
- Sodium: 350mg
- Fat: 10g
- Saturated Fat: 5g
- Unsaturated Fat: 3g
- Trans Fat: 0g
- Carbohydrates: 30g
- Fiber: 2g
- Protein: 9g
- Cholesterol: 20mg