👉 Let’s stay connected on social media!
Quick and Easy Mini Grilled Cheese on Hawaiian Rolls Recipe

QUICK REMINDER:
There’s a “jump to recipe” button for convenience, but if you head straight to the recipe card, you might miss useful ingredient notes, step-by-step tips, FAQs, and other helpful details that can make your dish turn out even better.
On the nights when everyone is hungry at the exact same minute and the sink is already half-full, I find myself reaching for recipes that feel almost like a magic trick. Not the kind that needs special tools or a grocery run, but the kind that asks very little of you, then quietly delivers something golden and melty and oddly calming.
Mini Grilled Cheese Hawaiian Rolls are that kind of trick. They are less “formal recipe” and more “kitchen move” you can keep in your back pocket. You take the soft pull-apart rolls that somehow always seem to be in the pantry, you add cheese, you add butter, and you let the oven do the rest while you breathe for a minute and maybe put the mail in a pile instead of sorting it.
They’re good for the in-between moments, when dinner is running late but small hands (or big ones) need something warm and reassuring right now, or when you promised to bring something to a game night, a potluck, or a late movie at home and realize you’ve got about 15 minutes to pull it together. This is also a great fallback when your carefully planned meal suddenly refuses to cooperate, like when a sauce breaks or the chicken is still stubbornly frozen in the middle, and you need a win on the table quickly.
If you ever loved pulling apart those cafeteria grilled cheese triangles as a kid, stretching the cheese just to see how far it would go, this is that feeling, updated and kinder to your schedule. And if you’ve already fallen for things like stuffed Hawaiian roll bakes, this version skews savory and comforting in exactly the same low-effort way.
Why this grilled cheese bake calms a hectic evening
Almost every home cook has a story about a grilled cheese that went wrong. Burnt toast, unmelted middle, a pan that turned too hot too fast while you turned your back for exactly three seconds. A stovetop grilled cheese demands your attention in a way that is fine on a slow Sunday, but almost cruel on a Tuesday at 6:15.
These mini grilled cheese Hawaiian rolls sidestep that whole high-alert dance. No flipping, no hovering, no peeking every thirty seconds. You build the whole thing in one connected slab of rolls, send it into the oven, and then you just wait for the right cues: the smell of toasted tops, the faint sizzle of butter on a hot pan, the sight of cheese bubbling gently around the edges.
The other reason this works so well is how forgiving it is. The rolls protect the cheese from overcooking, the butter helps everything brown evenly, and the oven gives you a little buffer of time. If you pull them at ten minutes, you’ll have softer, just-melted sandwiches. If life distracts you and they go to fifteen, you’ll get deeper color and toastier edges, but still nothing dry or ruined.
There is something quietly reassuring about knowing that once these are in the oven, you’ve already succeeded. All that’s left is cutting them into little squares and watching people circle the pan like they’ve never seen bread and cheese before.
What you actually need (and nothing more)
This is one of those recipes where the ingredients list looks almost too short, and that is exactly the point. You can dress it up later if you want, but the base is simple and solid, so it works even when the fridge feels bare.
Here is the core of it, written plainly so you can glance and mentally check your pantry:
- Sweet Hawaiian rolls
- Melty cheese (such as cheddar or American)
- Butter
That’s all you truly need for the classic, no-fuss version. From there, you can wander: a sprinkle of garlic powder over the tops, a thin swipe of mustard between layers, a few slices of tomato tucked in if your crowd likes a little freshness with their cheese. But you do not have to add a thing for this to be fully satisfying.

The calm, step by step: directions
Here is the part you can skim, then set your phone aside while you cook. It is as straightforward as a recipe gets, but a gentle sequence can feel nice when your brain is already juggling a full day.
- Preheat your oven to 350°F (175°C).
- Slice the Hawaiian rolls in half without separating them.
- Spread butter on the cut sides of the rolls.
- Place slices of cheese in between the rolls.
- Close the rolls and place them on a baking sheet.
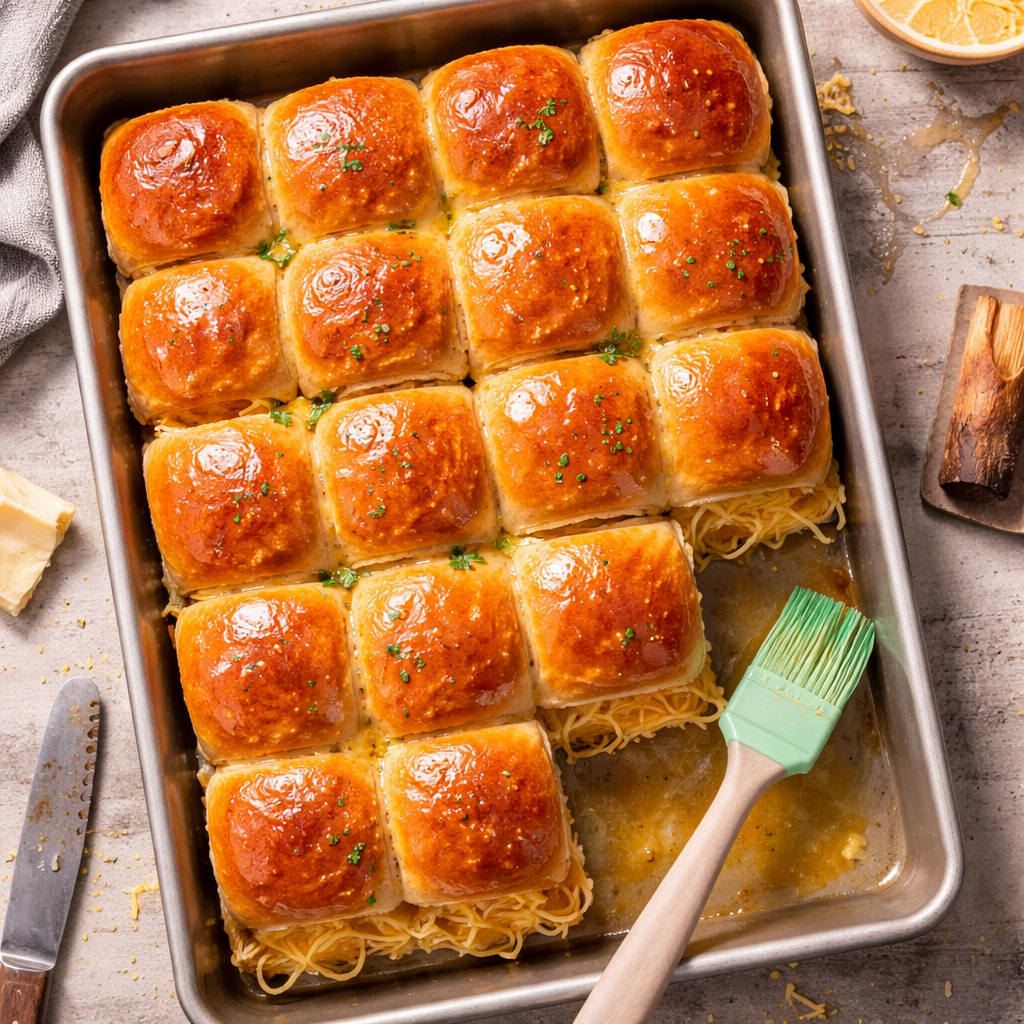
- Bake for about 10-15 minutes, or until the cheese is melted and the top is golden brown.
- Remove from the oven, let cool slightly, and serve warm.
Tiny choices that make them turn out just right
On paper, this recipe is so simple it feels impossible to mess up, but a few thoughtful decisions can shift it from “fine” to “oh, we should make this again.”
First, how you slice the rolls matters more than you’d think. Keep them connected, sliding a long serrated knife horizontally through the middle as if you’re opening one big sandwich. If you accidentally separate a few, don’t worry, just nudge them back together on the baking sheet so the sides still touch, that contact helps keep the cheese from leaking out.
Cheese thickness is your next quiet helper. Thin slices melt quickly and evenly, which is exactly what you want here. If you’re using pre-sliced American or cheddar, two thin layers can be nicer than one thick blocky one, giving you more even coverage and fewer bare bread spots.
About the butter: soft, spreadable butter will give you a much more even layer than cold, hard pats. If you forget to soften it, a quick cheat is to warm it gently in the microwave for just a few seconds until it is mashable with a spoon, not fully melted. When you spread it, aim for the cut sides of both the tops and bottoms, you’re building in flavor and a bit of crispness as the rolls toast.
And if you have ever made grilled cheese that browned before the cheese melted, trust the oven and the timing here. At 350°F, that 10 to 15 minute window gives enough time for the cheese to fully relax without scorching the bread. If your oven runs hot or the tops look dark at ten minutes, you can tent a loose piece of foil over the pan and give the cheese another minute or two to catch up.
How to serve them so people feel taken care of
There is a small pleasure in cutting into the baked slab and feeling it give under the knife, the cheese still molten and the rolls softly resisting. I like to cut them where the rolls are already scored, so you end up with neat little pull-apart squares that mimic the original shape, just filled with cheese instead of nothing.
On a busy night, I’ll slide the whole batch onto a wooden board or a platter, still all together, and let everyone pull what they want. Some nights they become the main event next to a bowl of tomato soup or a big salad. Other times they sit in the middle of the table alongside leftovers and snacky things and somehow tie the whole mismatched meal together.
They travel well too, which makes them an easy answer for those late-night “Can you bring something?” texts. Wrap the baking sheet loosely in foil, tuck in a dishtowel for insulation, and when you arrive, a quick rewarm in a low oven brings them right back to life. If your crowd liked savory breakfast ideas such as a cozy morning grilled cheese, these rolls land in the same comfort zone, just easier to share.
If there are children around, you might notice something: these little sandwiches invite play. Kids will pull them apart, stretch the cheese, dip them into soup, arrange them in patterns. It may slow down dinner in the best way.
Little variations for different moods
Once you’ve made the basic version a time or two, your hands will know the motions and your brain will naturally start asking, “What if I added…?” This is where you can adjust based on who is at the table and what’s left in the fridge.
For a sharper, more grown-up flavor, mix cheeses. A blend of mild cheddar for melt and something tangier like a bit of provolone or a sprinkle of grated Parmesan can deepen the taste without making it fussy. Just keep at least half of it a good, melty kind so you keep that satisfying pull.
If you like a hint of heat, a soft swipe of your favorite chili sauce or a few thin slices of mild pepper tucked under the cheese can wake things up. For those who love a classic diner-style grilled cheese, a thin brush of yellow mustard under the cheese adds that nostalgic tang.
You can also lean into the sweetness of the rolls by serving these alongside something bright and fresh, like orange slices or a simple crunchy slaw. The contrast makes everything taste more intentional, even if you pulled dinner together in ten minutes flat.
And if dessert feels like it should echo the same “fun but easy” energy, something playful like strawberry shortcake dessert rolls continues that theme of shared, pull-apart treats without demanding much more effort from you.
Questions that come up right as you preheat
You can assemble the rolls a few hours ahead, cover the pan, and keep them in the fridge. When you are ready to bake, let the pan sit at room temperature while the oven preheats, then bake as directed. The bread might feel slightly firmer from being chilled, but once it is warmed through and the cheese is melted, it softens right back up.
Any cheese that melts easily is your friend here. American, mild or medium cheddar, Colby Jack, or a blend of these all behave nicely. Very hard or crumbly cheeses will not give you that stretchy, gooey texture, so keep them as accents rather than the main cheese.
Yes. The oven or a toaster oven at a moderate temperature is your best bet, around 325°F until warmed through. The microwave will warm them too, but the rolls can turn a bit chewy, so use it only if you are in a real hurry.
Usually the butter on the rolls is enough to keep them from sticking. If your pans tend to grab, a piece of parchment paper under the rolls makes cleanup very easy.
Make sure the rolls go into a fully preheated oven so the heat starts crisping them right away. Also try not to overload with too many layers of cheese, a generous but even layer melts without pooling excessively.
A pan of grilled cheese and a bit of breathing room
There is a quiet sort of relief that comes from knowing you can make something people genuinely love without having to juggle timers, pans, and three different cooking methods. These mini grilled cheese Hawaiian rolls are that relief, baked into a single pan.
They are the kind of thing you can throw together after a long day, or hand off to a teenager to assemble while you handle something else, or make as a late-night snack when the house is finally still. And they do that small but important thing good food does on weeknights, they turn a moment of “What on earth are we going to eat?” into a moment of, “Oh, this will be nice.”
You slide the pan into the oven, you tidy a corner of the counter, you exhale. A few minutes later, the kitchen smells like toasted bread and warm cheese, and suddenly the day feels a little softer around the edges.
Print
Mini Grilled Cheese Hawaiian Rolls
- Total Time: 20 minutes
- Yield: 4 servings 1x
- Diet: Vegetarian
Description
Quick and easy mini grilled cheese sandwiches baked with Hawaiian rolls, perfect for any occasion.
Ingredients
Scale
- 1 package Sweet Hawaiian rolls
- 8 slices Melty cheese (such as cheddar or American)
- 4 tablespoons Butter
Instructions
- Preheat your oven to 350°F (175°C).
- Slice the Hawaiian rolls in half without separating them.
- Spread butter on the cut sides of the rolls.
- Place slices of cheese in between the rolls.
- Close the rolls and place them on a baking sheet.
- Bake for about 10-15 minutes, or until the cheese is melted and the top is golden brown.
- Remove from the oven, let cool slightly, and serve warm.
Notes
For extra flavor, consider adding garlic powder, mustard, or tomato slices. You can also use a mix of cheeses for a varied taste.
- Prep Time: 5 minutes
- Cook Time: 15 minutes
- Category: Appetizer
- Method: Baking
- Cuisine: American
Nutrition
- Serving Size: 1 sandwich
- Calories: 320
- Sugar: 6g
- Sodium: 350mg
- Fat: 15g
- Saturated Fat: 8g
- Unsaturated Fat: 6g
- Trans Fat: 0g
- Carbohydrates: 30g
- Fiber: 1g
- Protein: 12g
- Cholesterol: 25mg